
Are you figuring out how to fix laptop screen? Well, You’ve probably done it before. You were working on your laptop, and suddenly your screen went black. It happens to everyone at some point or another, but what are you supposed to do when this happens? Read on to find out how to fix a laptop screen!
First of all, don’t panic. The first thing you want to do is take a deep breath and try turning the computer off and then back on again. If that doesn’t work, plug in an external monitor or TV if possible so that you can see what’s going on with the problem. If none of these things help, there are still other things you can try before giving up entirely…read more here!
Also read: How to use Laptop as Monitor for PS4

Image credit: unsplash.com
Tips for Fixing Your Laptop Screen
Turn the laptop over and open the screen
Remove screws from the cover of each screw on a laptop that hold it to the frame of a laptop. – Use your hands to lift on either side of this piece and slide it off the screws. Set aside, make sure you remember where they go.
Remove screws that hold the top cover of your laptop to the bottom. These are usually labeled. – Gently lift on the keyboard and slide it back so you can see all of the clips holding it in place. There will be an outline along each side. Feel each one with your fingers until you find one that releases easily when pressed. Once you find it, you should lift the keyboard without much resistance. – There are usually two clips at the top holding it in place. Look closely at each one and gently push down on them while lifting the keyboard.
Now That Your Keyboard Is Loose Flip It Over and Lay Face Down
Look closely at each ribbon cable connecting the keyboard to the motherboard. – Press down on the tab holding it in place, and slide it out of position.
Gently lift on either side of the old screen and turn it over, reinserting all connectors back into their corresponding ports when you’re done. Don’t push down too hard when reinserting a cable, just enough to feel the click, so it’s secure.
Turn your keyboard back over and see where cables are connected to the motherboard. You will have to disconnect them one by one by pressing on the tab holding each ribbon in place, and sliding it out of position.
Also read: How to Clean a Laptop Fan
Unplug From the Motherboard and Remove It
Insert new screen into place and plug cables back into place, ensuring they are secure before pushing any of them down too hard. Turn the keyboard over and reconnect all cables to their corresponding ports on the motherboard, paying attention to how each one is inserted. Turn your keyboard back over and reattach it to the top cover of your laptop by sliding all clips holding it in place back into place. Replace all screws and screw covers and snap the bottom plate back onto the frame of your laptop.
Turn your computer on and ensure everything is working correctly before closing up! If you’ve tried everything and still can’t get your laptop to turn on, you may need to consider replacing its motherboard. Installing a new screen is usually the last resort for most problems because it is quite expensive and high risk, but in the end, it’s usually worth it.

Image credit: unsplash.com
Tips Involved When Dealing With Thin Laptop
If you are using an ultrabook or other very thin laptop, there are some extra steps involved with installing a new screen that you must follow.
There are usually two screws holding the bezel/frame of your laptop to the screen that need to be removed before prying apart with a spudger or other thin tool. Disconnect all cables from the motherboard and remove screws fastening plate inside the frame – Pry opens slightly at one end of the frame until you can see where the cables are connected to the motherboard.
Gently disconnect each cable and remove screws fastening them in place before pulling out your old screen completely.
Make sure you are installing your new screen in the correct orientation! If you don’t know how to tell, look up a specific guide for your laptop model.
Connect all cables to their corresponding ports on your laptop’s motherboard before closing it back up and screwing everything in place. Be aware of how each cable was originally displayed, and make sure to follow this when reassembling.
Snap the bottom plate back onto the frame of your laptop and fasten the bezel/frame to screen with screws that were removed earlier. – Turn your computer on and test out your new screen!
Most Common Problems with Laptop Screens
Cracked Screen
Cracked laptop screens are a common problem but can be fixed fairly easily. If your laptop screen is cracked, you will need to replace the screen. You can find replacement screens for most laptops online or at a computer store.
Yellowed Screens
If your laptop screen has become yellowed or discolored, you will need to clean the screen. You can purchase cleaning kits at most computer stores.
Black Screens
Black screens are often a problem with backlighting and inverter boards. If the screen seems completely black, there may be no power getting to the screen.
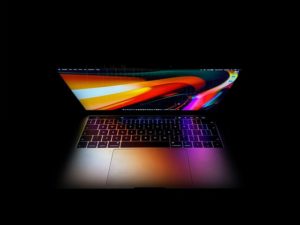
Image credit: unsplash.com
Vertical or Horizontal Lines on the Screen
If your laptop screen has lines running vertically or horizontally across the screen, you may need to replace the LCD cable. Fortunately, this is one of the easier repairs that can be done on a laptop.
Dark or Blurry Screens
A dark or blurry screen may be a sign of faulty backlighting, an inverter problem, or a defective CCFL. This can often be fixed by replacing the backlight and inverter boards.
Also read: How To Measure A Laptop Screen
Conclusion
Getting a new screen for your laptop is quite easy, depending on which model you have, but it requires some technical knowledge to assemble everything back together in the best way possible. If you are struggling with installing a new screen or would like someone else to do it for you, find yourself a laptop technician who can help you get back to work!
2 comments
Comments are closed.