
How to remove hard drive from laptop has been a bother to many. If you’re like most people, you probably take your laptop’s hard drive for granted. It just works, doesn’t it? Well, what if it didn’t? What if your hard drive failed and you had to remove it from your laptop to get it repaired or replaced?
It might sound daunting, but removing a hard drive is a pretty easy process. In this article, we’ll walk you through the steps involved in removing a hard drive from a laptop. We’ll also show you how to protect your data before doing so. Let’s get started!
Also read: How to Clean a Laptop Fan
Image credit: pixabay.com
Steps To Follow When Removing Hard Drive from Your Laptop
1: Back Up Your Data
Before you do anything with your laptop’s hard drive, you must back up all of the data on it. If the hard drive fails and you can’t recover the data, this could mean permanent loss of all your files – including precious family photos and personal documents. The best way to make sure nothing bad happens to your data is to back it up before beginning.
If you haven’t already, we recommend fully backing everything on your laptop’s hard drive by using the automated backup feature built into Windows. Alternatively, suppose you have another computer available. We suggest copying all your data from the afflicted hard drive onto another machine using a USB external hard drive or flash drive. If you have no other options, you can view all of your data files directly on the failed laptop’s hard drive by opening them one-by-one in Windows Explorer. Once opened, you can either print them out to take notes or carefully retype the data into notepads on your new laptop.
2: Locate the Hard Drive in Your Laptop
Your hard drive is usually located on the underside of the laptop’s base, where it attaches to the motherboard. Once you have access to this area, you’ll be able to determine exactly which component has failed. Unfortunately, most laptops don’t have a part number stenciled on the drive for easy identification, so you may have to go through a guessing game. Fortunately, though, most laptop hard drives are quite small and can only fit in one location – meaning it shouldn’t take you too long to locate your particular model.
3: Unplug Everything from the Computer
Before going further, you should unplug your laptop from power and remove the battery. This will prevent any chance of electrical shock or short circuits caused by working inside an enclosed area with a metal chassis. In addition to this, you should also detach all cords from the laptop – including power adapters, USB cables, external monitors, and even Ethernet cables.
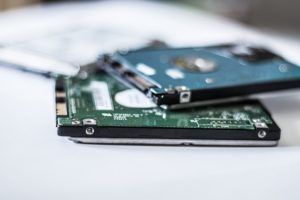
Image credit: pixabay.com
4: Unplug the Hard Drive from Both the Motherboard & Power Supply
Once you have your computer completely unplugged, it’s time to disconnect the hard drive from the motherboard. Usually, this is done by loosening a few screws on either side of the hard drive. Once the screws are loose, you’ll be able to slide it out of its housing on the motherboard.
5: Unplug the Power Supply
Finally, before removing your hard drive from its housing on the bottom of your laptop, you should unplug all cables coming from the power supply unit. Usually, these can be easily popped out of their sockets by pressing down on a small plastic clip.
Also read: HOW TO CHARGE LAPTOP WITHOUT CHARGER
6: Detach the Hard Drive from Its Housing
Next, you have to detach the hard drive from its housing on the bottom of your laptop. In most cases, the housing is held to the laptop with small screws that can be removed with a Phillips-head screwdriver. Once you’ve done this, your hard drive should slide easily out of its housing.
7: Clean Off the Old Adhesive & Apply a New One (Optional)
Before putting your hard drive back into the laptop, you should clean off all old adhesives from both pieces. To do this, take a cotton swab dipped in rubbing alcohol and wipe it down on both pieces. Then, reapply the adhesive to the bottom of the drive-by applying two small dots to one end of the drive, waiting 10 seconds to dry, then repeat on the other side. If it’s really dirty or has been there for a while, this probably won’t be necessary – but if your hard drive is relatively new and still has a fresh coating of adhesive, you’ll need to remove it before reinstalling the drive in your laptop.
8: Plug the Hard Drive Back Into the Laptop
Once you’ve cleaned off any old adhesive, it’s time to plug your hard drive back into its housing on the bottom of your laptop. If you detached and reattached all components correctly, this should be a simple task – slide the hard drive into place and replace any screws you removed earlier.
9: Reattach the Power Supply Unit & Motherboard
Once you’re finished with the hard drive, turn your attention to the power supply. Reattach it to your laptop along with its corresponding cables and any other cords that were detached from it earlier. Once this is done, you’ll be able to plug your laptop back into power and replace the battery.
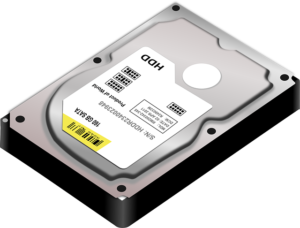
Image credit: pixabay.com
10: Reattach All Peripheral Components & Plug
Finally, all that’s left is to reattach any cords that were detached earlier – including external monitors, USB cables, Ethernet cables, and even power cables. Then, you can plug your laptop back into power and enjoy the results of your hard work!
Also read: HOW TO MEASURE A LAPTOP SCREEN
Why Should I Clean My Old Adhesive?
The only reason I would recommend cleaning the old adhesive is if it appears to be new and hasn’t been attached to the bottom of your laptop for long. If this is the case, it most likely has a fresh adhesive coating and will not be too dirty or contaminated to attach again. However, if you feel like removing the old adhesive is necessary (for whatever reason), there is no problem with doing so – make sure to reapply some fresh adhesive before putting your drive back in place!
Conclusion
This guide outlines the step-by-step process of removing and replacing your hard drive on nearly any laptop. Of course, this process will differ slightly from computer to computer. Still, the basic idea is always the same: detach peripheral components and separate the power supply from your motherboard before removing your old hard drive so that it can be safely replaced with a new one. If you follow these steps, your hard drive should be as good as new and ready to function without any problems for years to come!